Admin Rental Dashboard Overview
Login to your Admin Rental Dashboard
Your Admin Rental Dashboard is where you will manage all aspects of your rental company. To manage your Any.Rentals subscription and related account information, use your Account Manager instead.
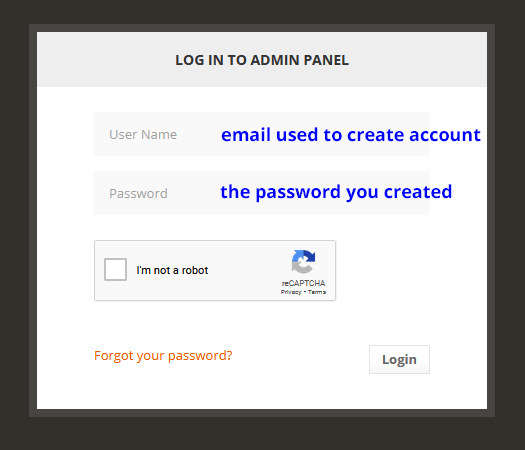
To begin, login to your Admin Rental Dashboard using the link provided in your subscription email.
User Name: The email address used to create your account
Password: The password entered when creating your account
If you do not remember your password, use the “Forgot your password?” link to reset it.
Rental Website Tab
This link will open your website “frontend” that is visible to your online visitors and customers.
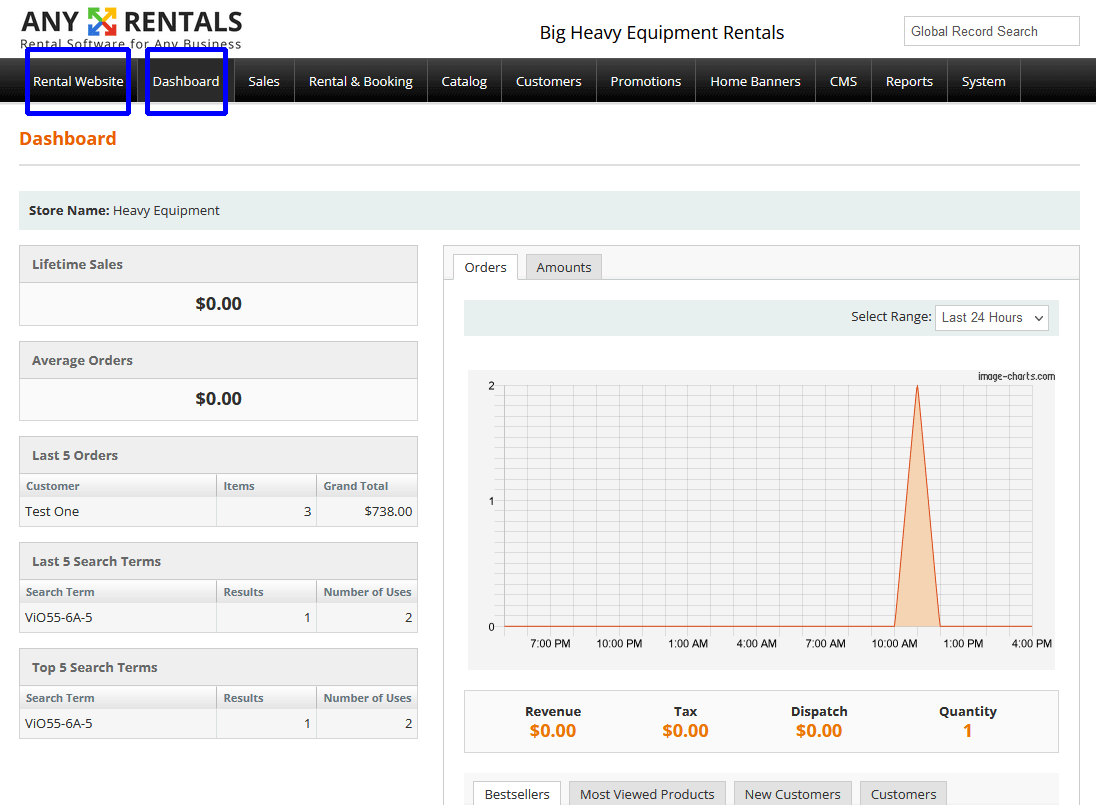
Dashboard Tab
Your Admin Dashboard gives you a snapshot of your Lifetime Sales, Average Order, Last 5 Orders, Last 5 Search Terms and Top 5 Search Terms. It will also display graphical order summaries for number of orders, dollar amounts, etc.
Sales Tab
The Sales tab gives you access to sales management tools and sales related information from your site. You can use your website for Rental Sales, as well as selling regular whole goods or parts. Rental Sales and regular Sales are both accessible from the Sales tab.
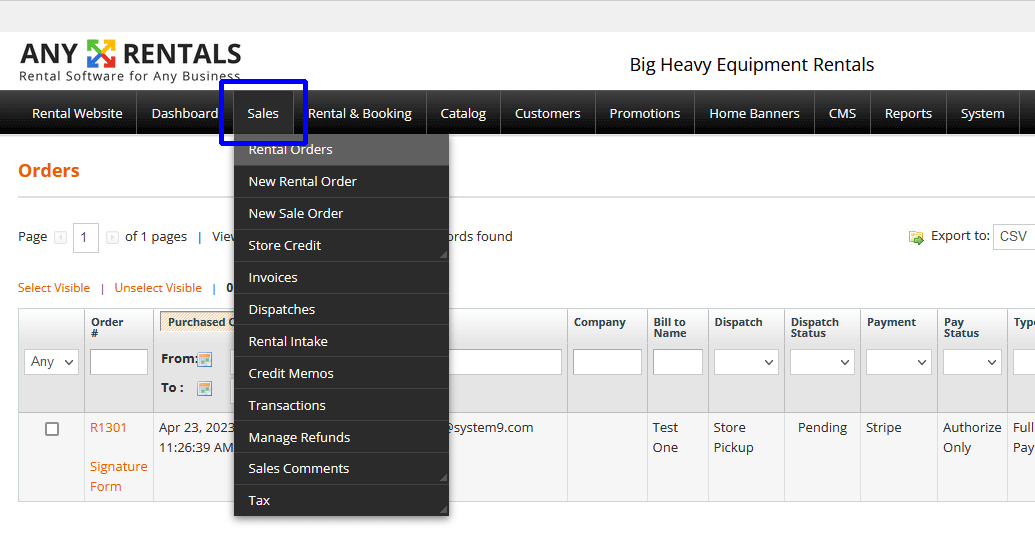
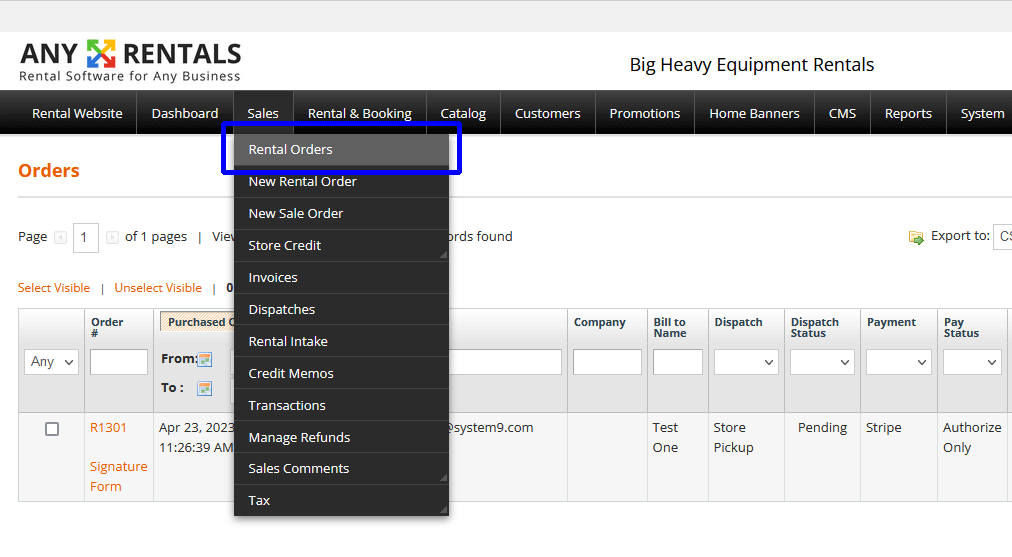
Sales > Rental Orders
Selecting Sales > Rental Orders will display a list of all current and previous rental orders. To view more detailed order information, click the order number, or anywhere on the order row. This will open the order details page. The order details page will display all information related to the selected order.
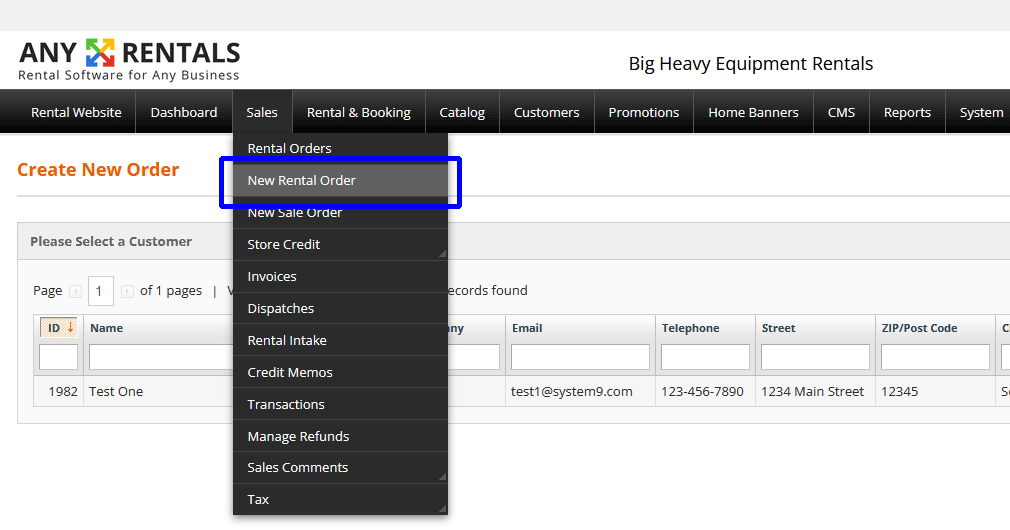
Sales > New Rental Order
To create a new rental order, select Sales > New Rental Order. This will open a page showing all current rental customers registered on your site. Here you can search for an existing customer by name, email address, etc.
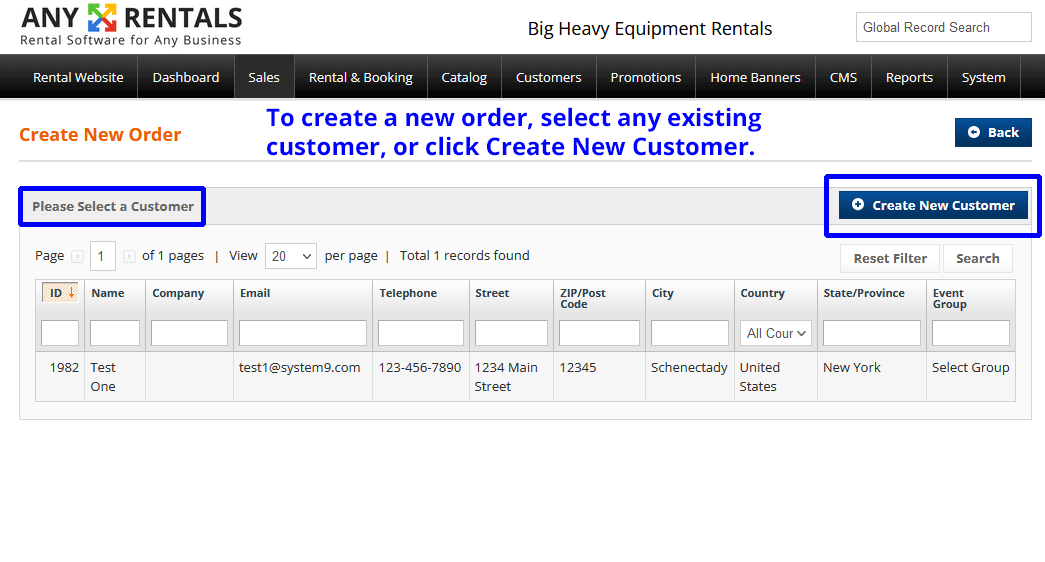
To create an order for an existing customer, click anywhere on the desired customer’s row to proceed with the order. To create an order for a new customer, click the “Add New Customer” button to create a new order and add a new customer account at the same time.
In this example, we will Create a New rental order and add a new customer during the same process.
Start by selecting Sales > New Rental Order > Create New Customer as shown in the image.
After clicking the “Create New Customer” button, a “Store Locations” page will load. If you have multiple locations, select your location. If you only have one location, select your store.
Once you select a location, the page will automatically refresh and load the next step in the order creation process.

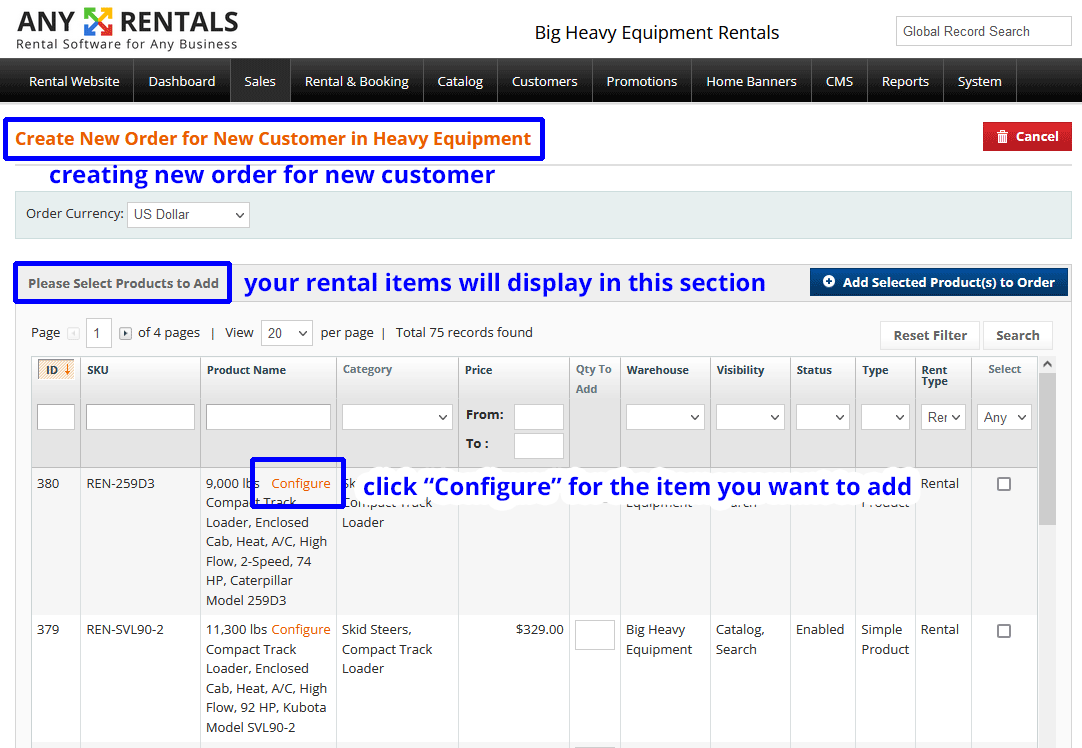
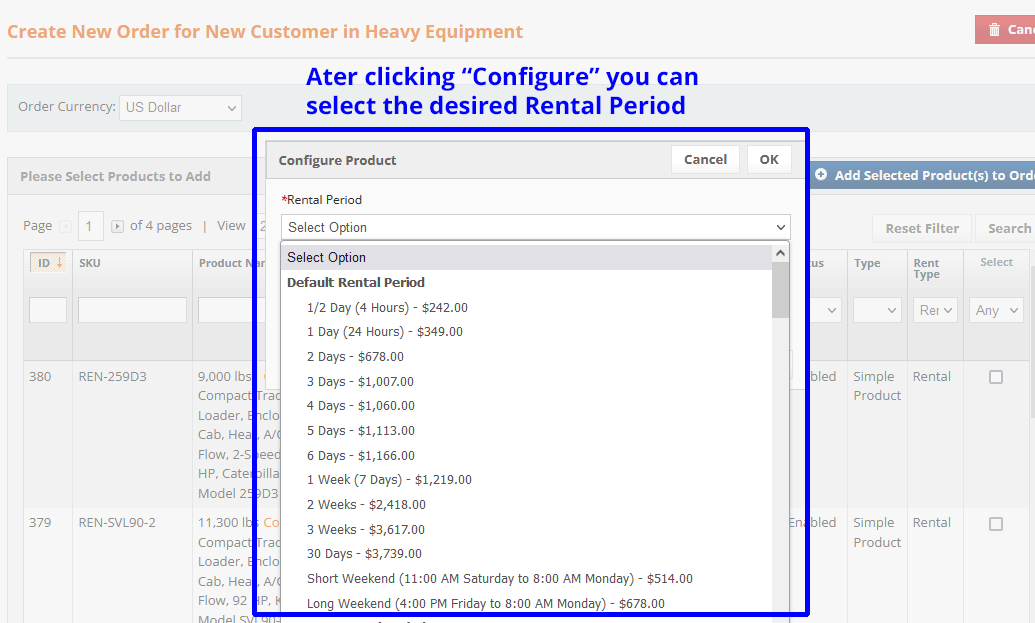
The next page will display “Create New Order for New Customer” (or, “Create New Order for Existing Customer Name” if using an existing customer). On this page, you will see a list of all your rental products. Select the item you want to add to the order, and click “Configure.”
After clicking “Configure” you can select the desired Rental Period.
After selecting the Rental Period, next select the Starting Date / Time. Dates in the past or dates that your rental store is closed are grayed-out.
Any date with a Red X indicates that the item is not available on that date, typically because it is already reserved for another rental.
Any date displaying in orange with a red dot means that date is partially available. For example, an item may be out on rental until 11:00 AM, but available for a new rental after it is returned at that time.

After selecting the Rental Period and Start Date / Time, you will have the option to select any related items that you may have defined for this product.
If there are no related items or you do not wish to add any to the order, click “OK.”

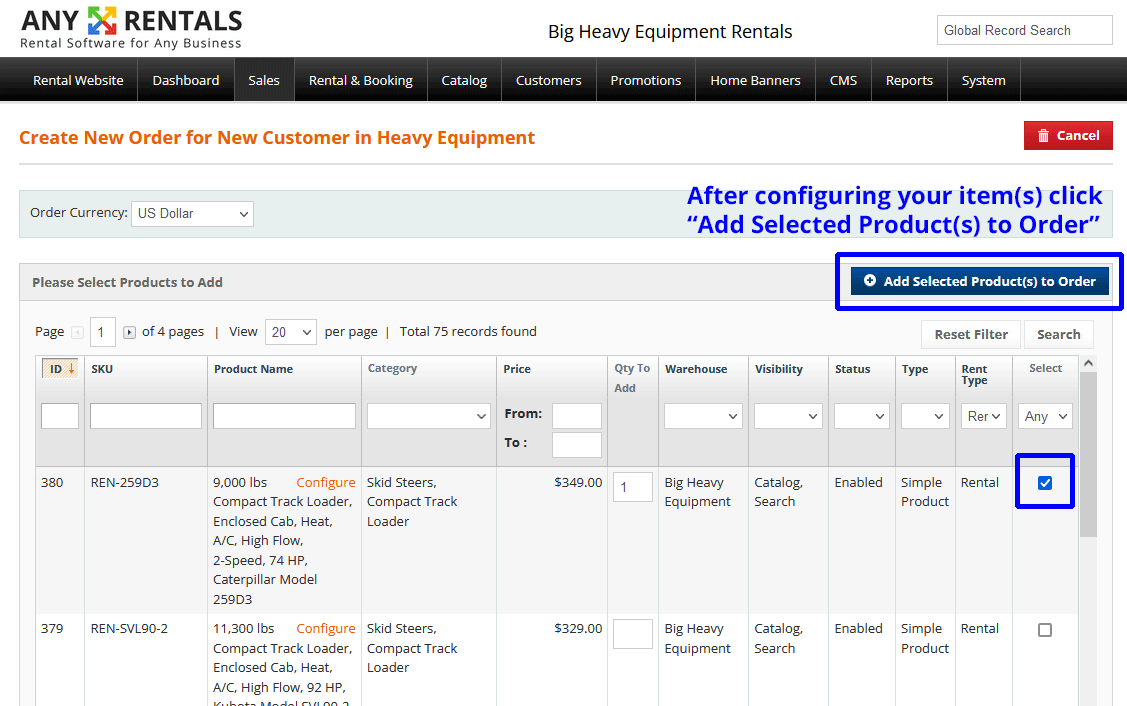
After configuring your item(s) click “Add Selected Product(s) to Order.”
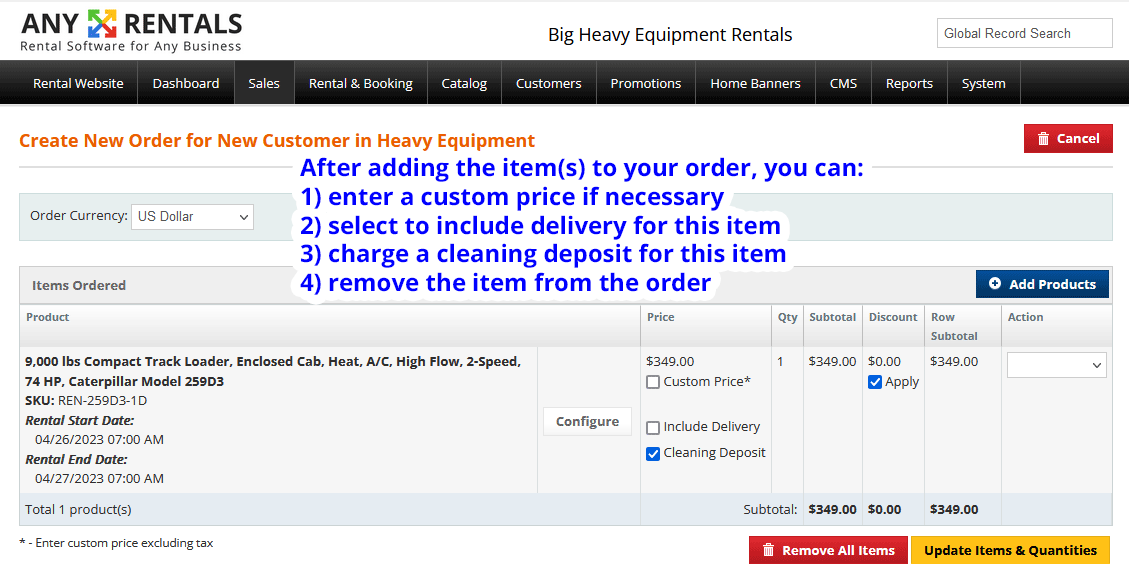
After adding the item(s) to your order, you may also:
- Enter a custom item price if necessary
- Select to include Delivery for this item *
- Charge a Cleaning Deposit for this item *
- Remove the item from the order
* Delivery and Cleaning Deposit options both require additional setup in your Admin before they will be available when creating a new order.
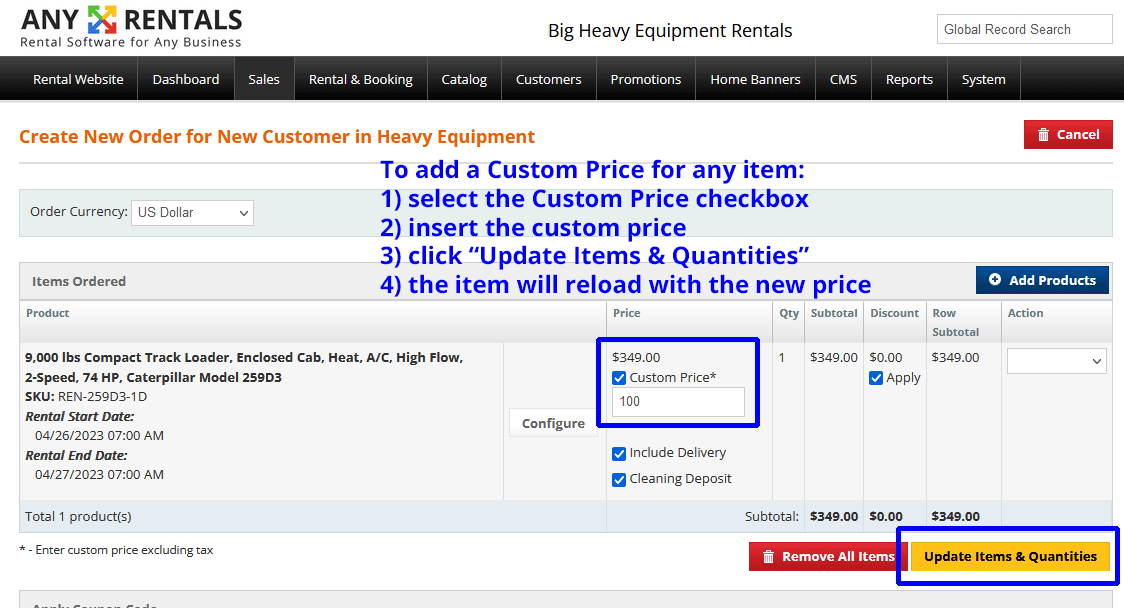
To add a Custom Price for any item:
- Select the Custom Price checkbox
- Insert the custom price
- Click “Update Items & Quantities”
- The item will reload and display the new price
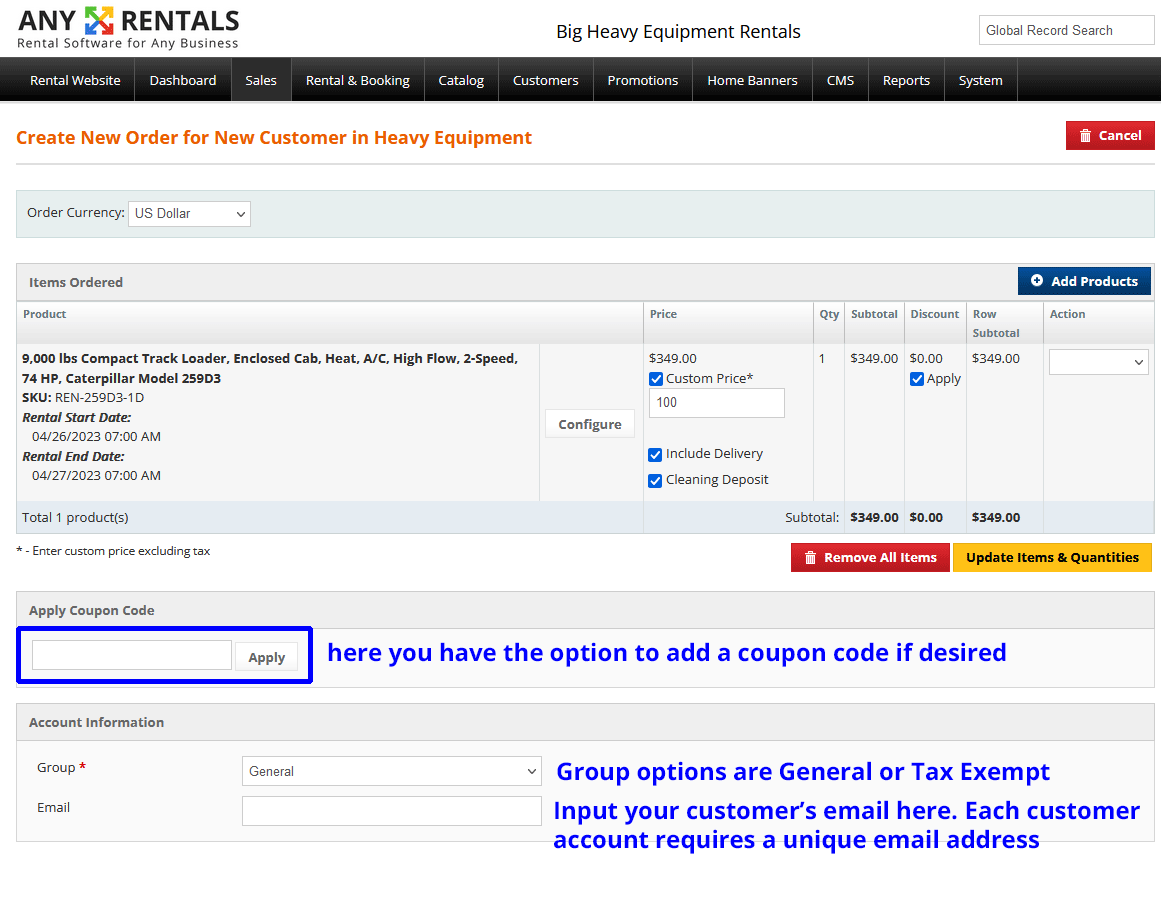
The next section allows you to enter a Coupon Code for this order if desired.
You also can select the appropriate Customer Group. Group options are “General” (regular customers) and “Tax Exempt.”
Enter your customer’s email address. Each customer account is required to have a unique email address associated with it. If you customer does not have an email address and/or does not want to provide one to you, leave this field blank and a unique email identifier will be automatically generated. This will not be a real email address, it is just a unique identifier associated with the customer’s account.
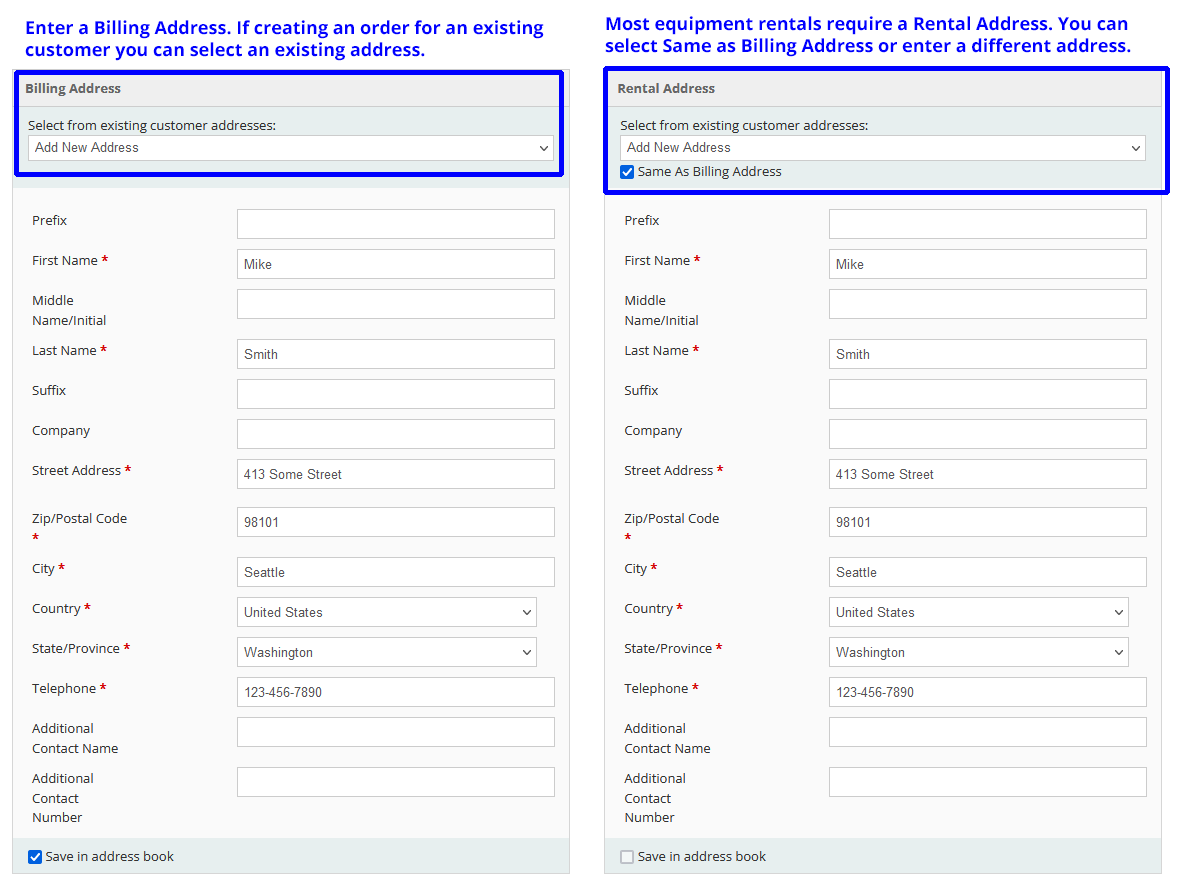
Next is the Driver’s License section. Here you can enter your customer’s license expiration date and upload a copy of their license if desired. All uploaded licenses are watermarked for security purposes.

After the Driver’s License info, you will enter your customer’s billing information and the Rental Address where the rental equipment will be used. Certain types of rentals do not require a Rental Address, so this may not be visible for your rental type.
If you do not need a specific Rental Address, you can just select the checkbox “Same as Billing Address.”